On-site ad campaigns
On-Site Ad Campaigns: Boost Your Listings with ClassifiAd’s Featured Ad Campaigns
Running successful ad campaigns is crucial for increasing the visibility and engagement of your listings, and the ClassifiAd theme makes this easier with its On-site Ad Campaigns feature. Through this system, users can promote their ads to Featured Listings, ensuring premium placement and maximum exposure on the platform.
Why Promote to a Featured Listing?
Promoting your ad to a Featured Listing offers several advantages that can significantly improve the visibility of your listing:
– Premium Placement: Your listing is pushed to the top of the search results, making it one of the first ads users see.
– Top of Listings/Results: Featured ads appear prominently in the most visible areas of the listing pages, improving the chances of user engagement.
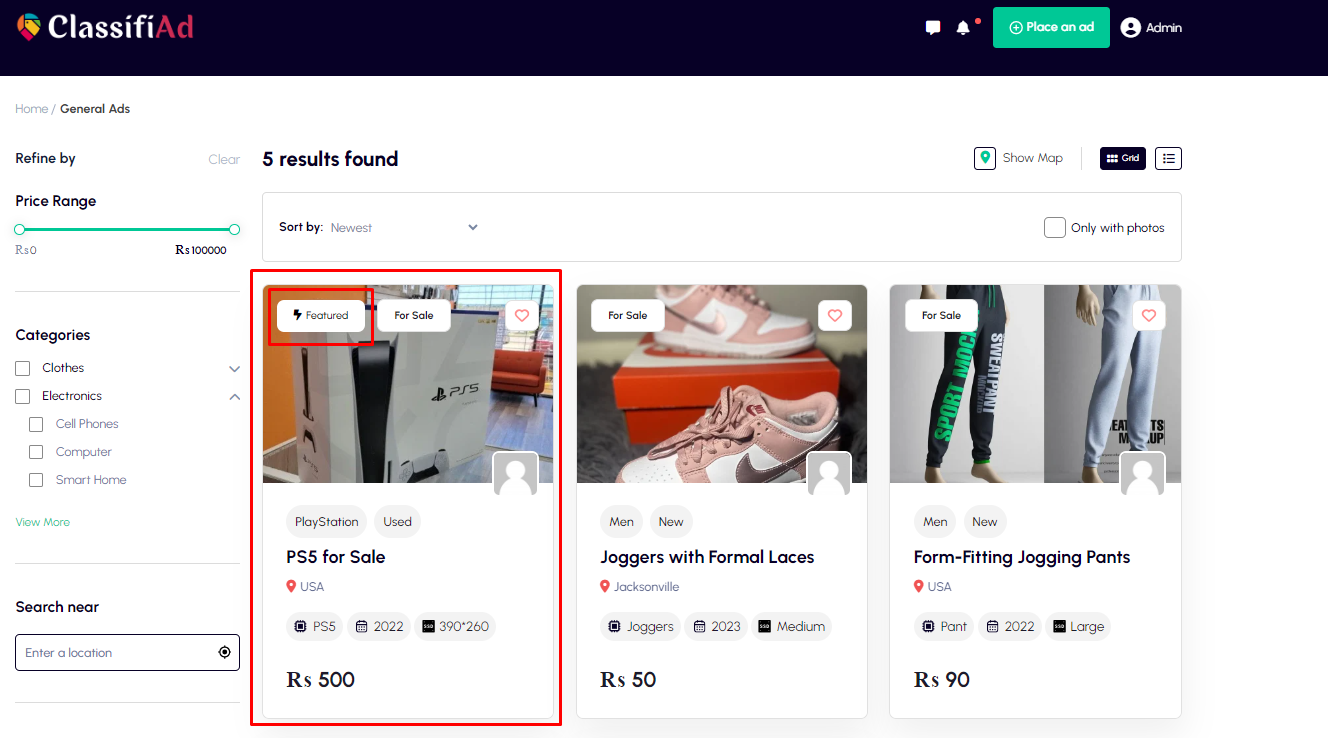
– Highlighted Styling: Featured ads are styled differently, drawing attention with unique visuals to make them stand out among regular listings.
– Boosted Visibility: With these features combined, your listing gets more views and interactions, helping it gain priority over competing ads.
Step-by-Step Process: How to Run a Featured Ad Campaign
The ClassifiAd theme makes it simple for users to launch their own featured ad campaigns. Here’s a step-by-step guide:
1. Access the User Dashboard: Log into your account and navigate to your User Dashboard.
2. Boost Your Ad: In the dashboard, click on the Boost Your Ad section. This will take you to the boost campaign options for your existing posts.
3. Select the Boost Type: From the list of available post types, select the one for which you want to boost the ad. Then, click on New Boost to start the promotion process.

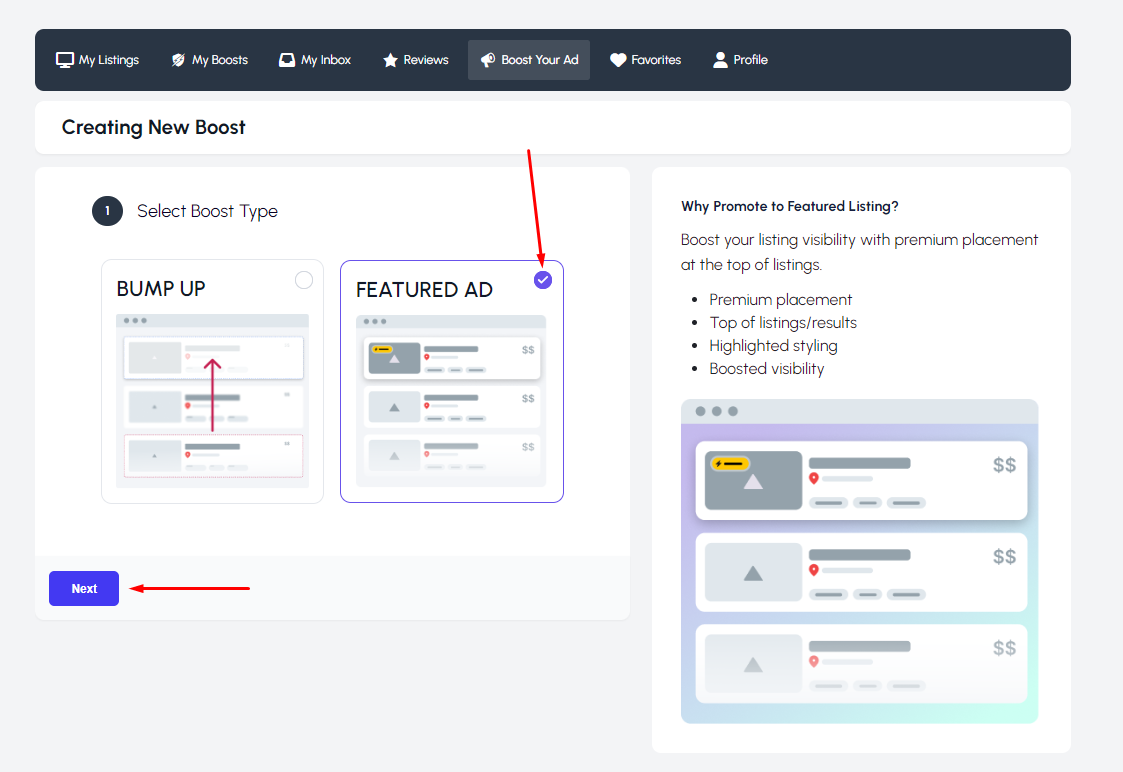
4. Choose Boost Option: Two types of boost options will appear:
– Bump Up: This pushes your ad higher in the listing but does not provide the enhanced visibility of a featured ad.
– Featured Ad: Select Featured Ad to ensure premium placement with all the advantages listed above.
5. Enter Ad Details:
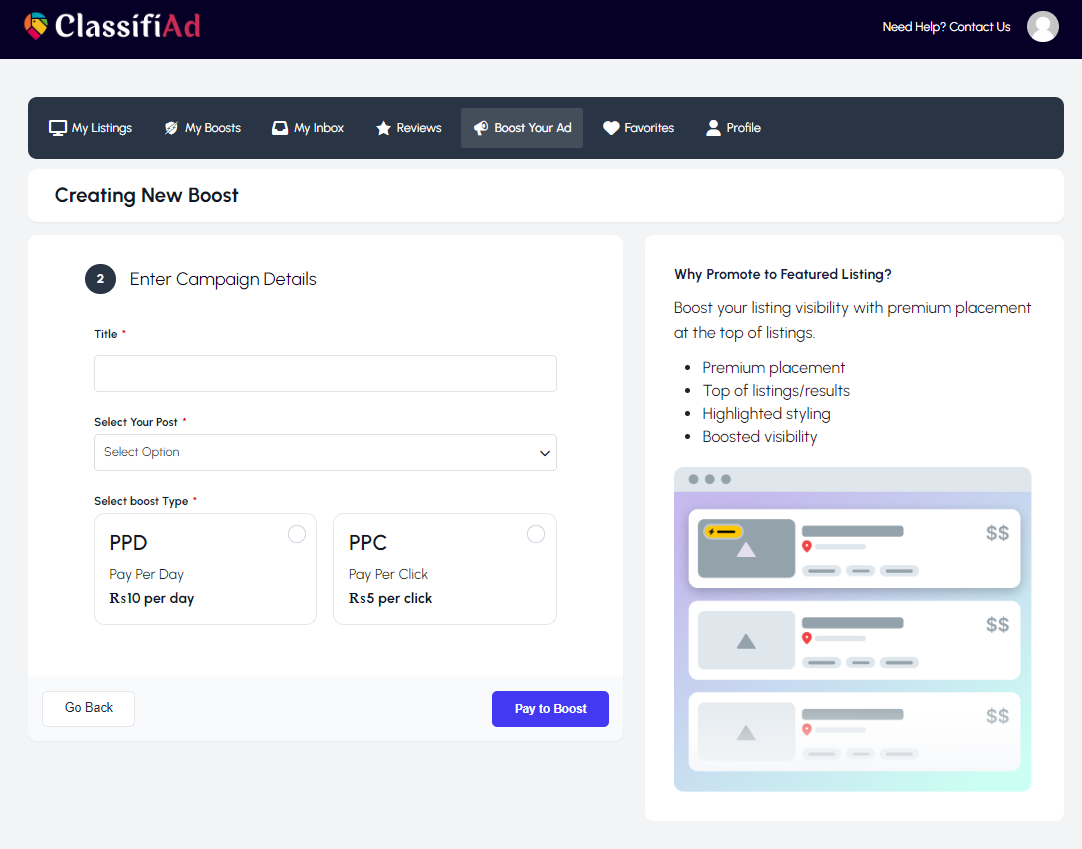
– Enter the Title of your ad.
– Select the Post you want to run the ad for (from your available listings).
6. Select Boost Type:
– Choose between two payment models:
– Pay Per Click: Pay based on the number of clicks the ad receives.
– Pay Per Day: Pay a flat fee for the number of days you want your ad to remain featured.
7. Select Pay Per Day:
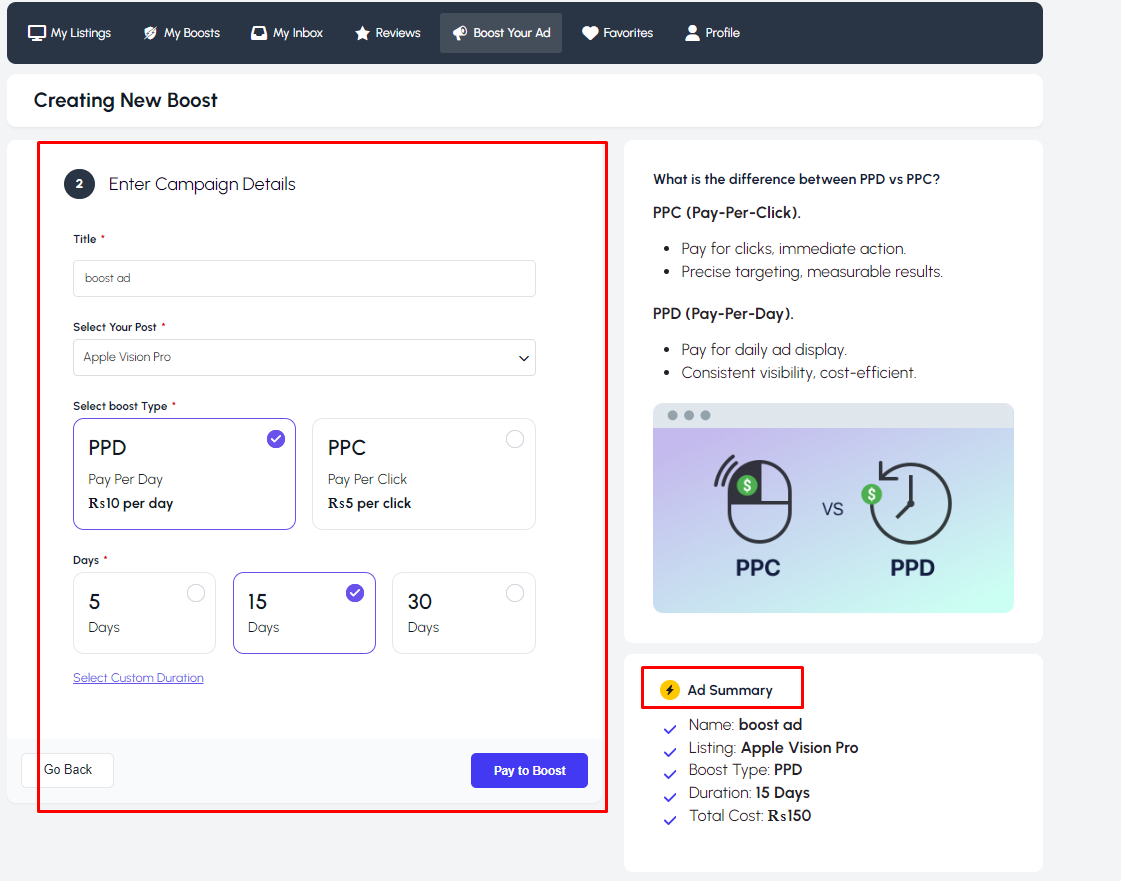
– If you choose Pay Per Day, select the number of days you want your ad to be featured.
8. Ad Summary: You will see an Ad Summary on the right-hand sidebar at the bottom. This summary displays the details of your promotion, including cost, duration, and ad type.
The price displays as Pay per click and Pay per day can be set from Cubewp >> Post type forms
Select post type as Booster and then press Form settings then at the bottom of the form you can see the amount set for Ads rates.

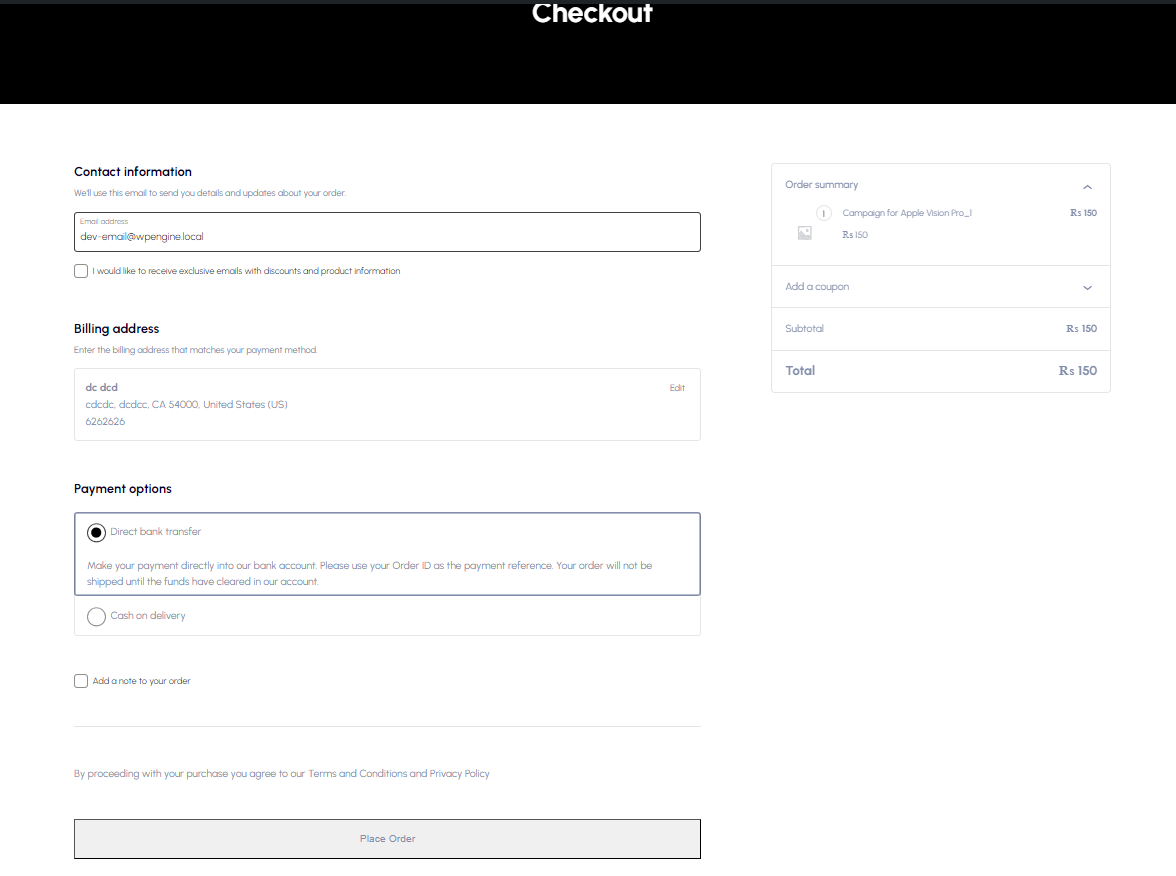
9. Payment and Checkout: Click on Pay to Boost to proceed to the checkout page. Enter your payment information, select your payment option, and press Place Order.
10. Order Completion: Once the payment is processed, the system will create the order. Now, the admin needs to confirm the order.
11. Admin Payment Processing: The admin will manually complete the payment process by marking the order as completed in the system.


How the Ad Displays
Once your ad promotion is complete and the payment is confirmed, your Featured Ad will display as:
Conclusion
ClassifiAd’s On-site Ad Campaigns allow users to maximize the visibility of their listings through Featured Ads. The easy-to-follow process ensures that you can boost your ads quickly and effectively, giving your posts the spotlight they deserve. By promoting your listings through Premium Placement, you can increase the chances of driving more traffic and engagement, ultimately leading to better conversions.
Take control of your ads and boost them today with ClassifiAd!
