Create custom fields for any post type
To create custom fields for any Post Type in ClassifiAd, please follow the below steps:
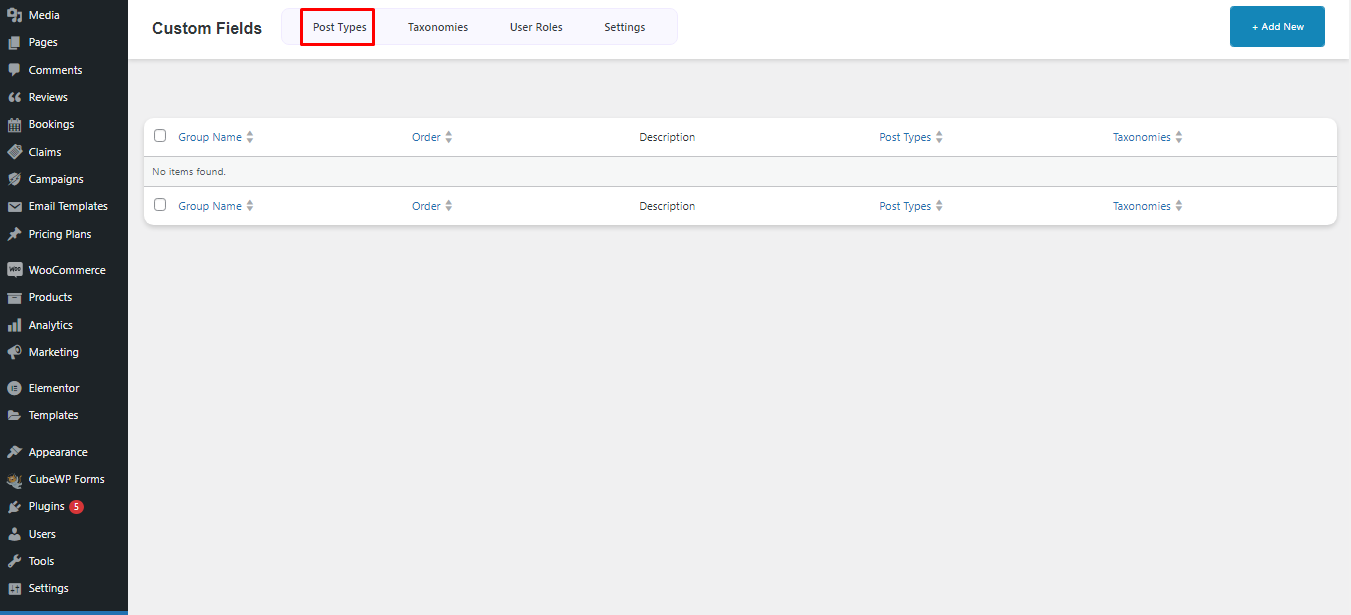
- Go to CubeWP
- Navigate to Custom Fields
- Click on Post Type
- Click the Add New button.

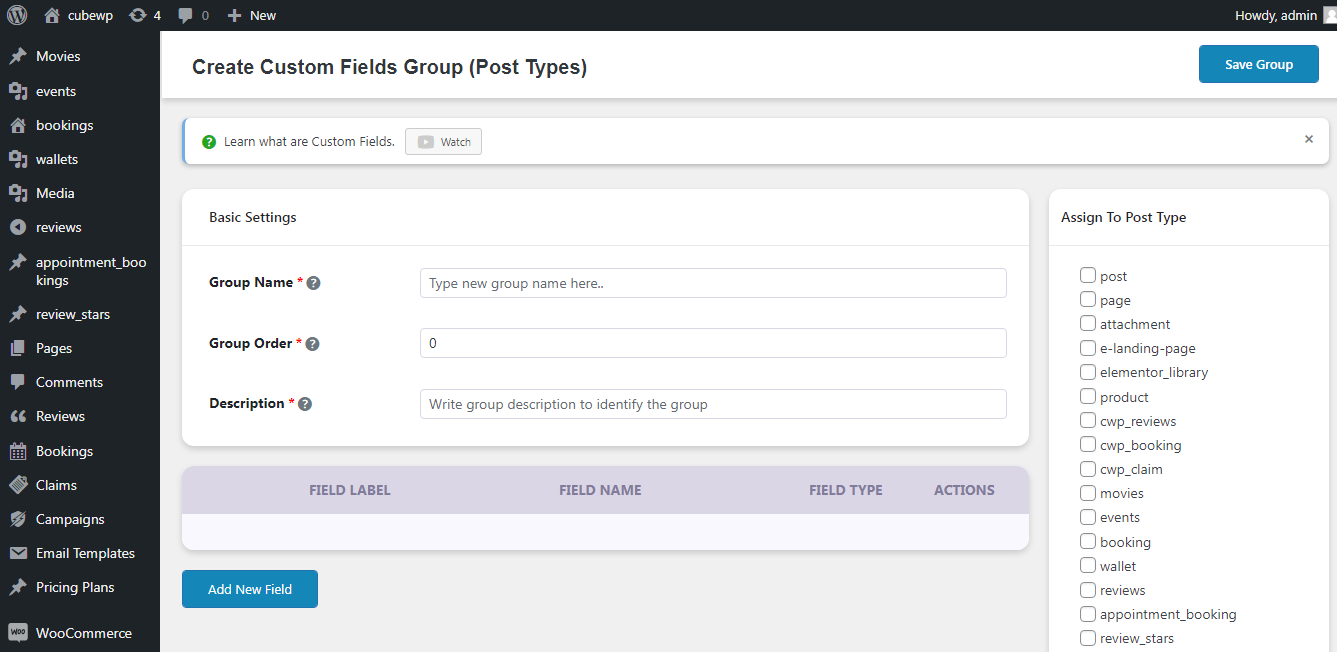
A new window will open with options such as Group Name, Group Order and Description.
- Group Name: Provide the Group name for your Custom Fields.
- Group Order: Manage the Menu Position for your Group.
- Description: Briefly describe the purpose of Your Group.

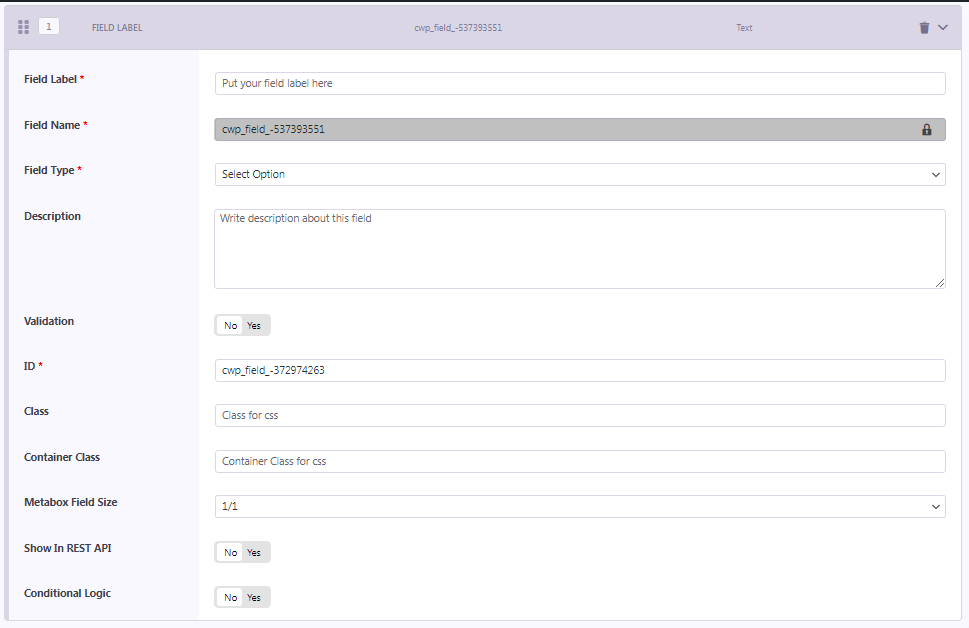
When you click on Add New Field the screen will expand with numerous options. You can fill in these fields to tailor your custom fields according to your specific requirements. These options include:
- Field Label: This is where you specify the name or label for your custom field (e.g., “Author Name”).
- Field Name: It automatically generates an internal name for the field, typically not modified.
- Field Type: You choose the type of field (e.g., text input, dropdown) that suits your data.
- Description: Optionally, you can provide a brief description to explain the field’s purpose.
- Validation: If necessary, you can set validation rules for the field.
- ID: An internally generated ID for the field, often not changed.
- Class: You can assign a CSS class to style this particular field.
- Container Class: Apply a CSS class to the container that holds this field.
- Metabox Field Size: Determine the field’s size within the Metabox (e.g., 1/1 for full width).
- Show In REST API: Decide whether this field’s data should be accessible via the REST API.
- Conditional Logic: Configure conditions for displaying or hiding this field based on specific criteria.

- After creating custom field types you need to assign the fields with a post type displaying at the right sidebar.
- After Assigning the custom fields to the post type you need to save group.
Learn More:
To Learn More About Custom Field Types, Click Here
